Adminstrators Guide
Security is not a feature of Rizkly—it is its foundation. This guide assumes that we operate in a hostile environment where misconfiguration, credential compromise, insider misuse, and external attacks are realistic and ongoing risks. Security is paramount. Please contact your Rizkly SME or support if you have any questions Every administrative action has access and security implications, and each feature that you manage contributes to the overall trustworthiness of the system.
This guide is intended for administrators with responsibility for safeguarding data stored in your Rizkly account, enforcing user role-based access, maintaining system integrity, and ensuring compliance with organizational and regulatory security requirements. We want to emphasizes the importance of secure-by-default configurations, least-privilege access, strong authentication and auditable change management. Convenience should never take priority over protection.
Please consider security-critical tasks and settings along with the risks of improper configuration and the recommended mitigation strategies. Again, your Rizkly support specialist is here to answer and assist as needed. Users with administrative access are expected to understand their organization’s threat model and apply the guidance accordingly. Failure to follow the practices outlined here may expose your account, its data, and dependent services to compromise.
Please review this guide in full early in your time with Rizkly. Treat administrative credentials as high-value assets that are not to be shared and consult your compliance expert for more details on settings and configuration. Assume that attackers will attempt to exploit any weakness—technical or procedural. The security of your Rizkly accounts ultimately depends on all of us working hand in hand and properly administering access.
When creating a new user you may give them their role in Rizkly. You can do that on the edit page of their user.
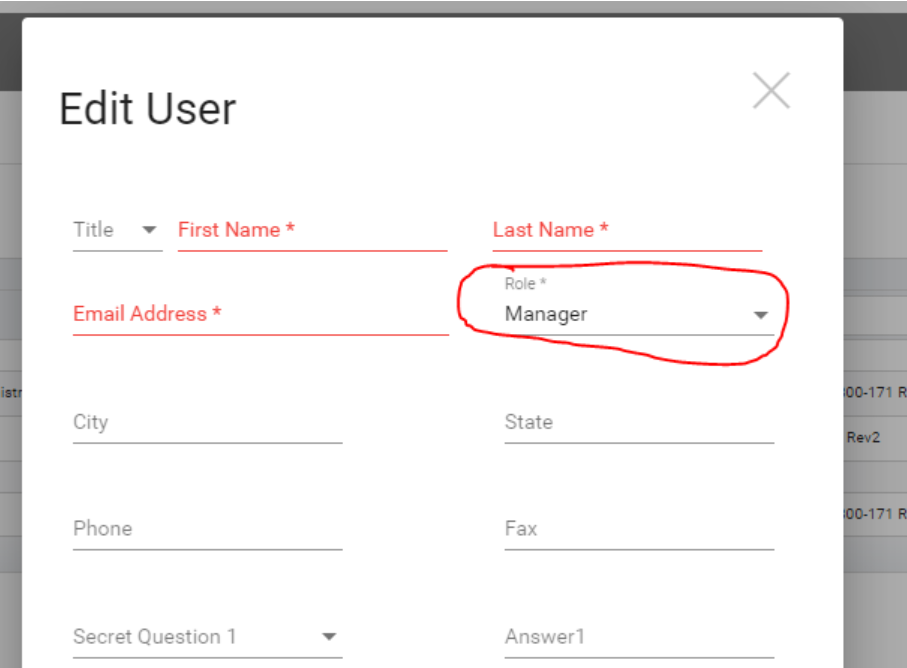
When giving them their role, there are 10 to choose from.

In order:
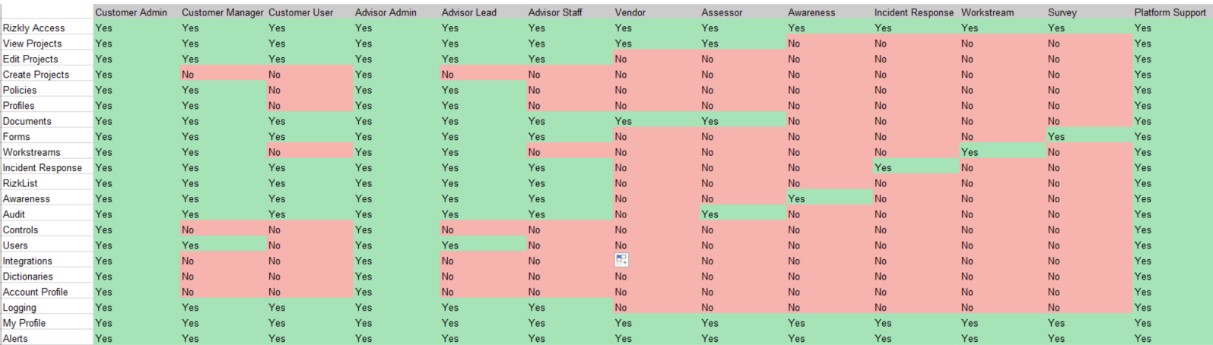
Customer Administrator & Advisor Administrator: Rizkly tenant administrators have permission to perform these admin level tasks:
- Create Projects
- Create API Integrations
- Create MFA and OIDC logins
- Access The Vault
- Edit Control Frameworks
- Add/Remove Users
- Edit Tenant Account Settings
User: Basic user on the customer side, this user can fill controls of projects.
Manager: The manager on the customer side, this user can fill controls of projects, and also edit profiles, surveys, documents, etc.
Advisor Staff: A basic user on the advisor side.
Advisor Lead: A manager on the advisor side.
Vendor: Role for third party vendors, only have access to specific controls of a project they are involved and may work on those.
Awareness: Can only access the Awareness Training Modules, intended to complete controls that require training courses.
Assessor: Auditor to bring in to view Rizkly project evidence, gaps, ICSes, etc.
Survey: Can only access the Surveys, intended to complete controls that require surveys.
Workstream: Role for non-compliance team members who may be instructed to contribute to a workstream task. Only have access to Workstreams.
Platform Support: A Rizkly staff member may be assigned this role to help with troubleshooting and support.
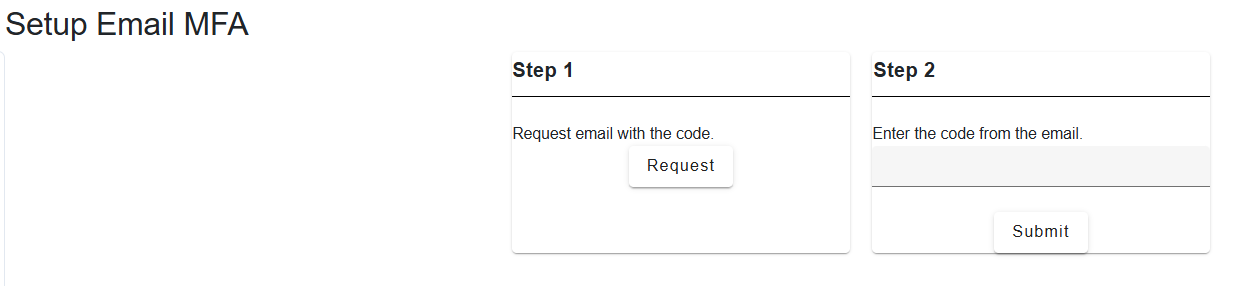
To enable TOTP MFA, first head into the “My Profile” section by clicking the gear on the bottom left.
Note: To enable MFA for your user, MFA must first be enabled by a tenant administrator in the account settings.

Then, head to “MFA” and click “Enable Email MFA”.

Then, complete the steps to enable MFA for Rizkly.
OpenID Connect (OIDC) is an identity layer built on top of the OAuth 2.0 framework. It allows third-party applications to verify the identity of the end-user and to obtain basic user profile information.
Rizkly has features to set up OIDC connection for your Rizkly tenant. To begin, head to “Account Settings” by clicking on the gear icon on the bottom of the left hand menu.
Head to the second tab, called “Settings” and find the checkbox for “Enable OIDC Authentication”
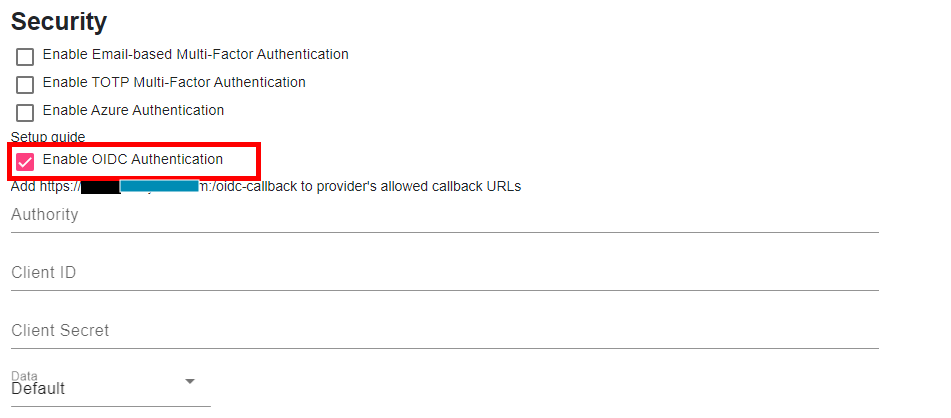
The Authority (Domain), Client ID, and Client Secret fields will come from your SSO provider. In the field of your SSO provider, add the top link to the allowed callback URLs.
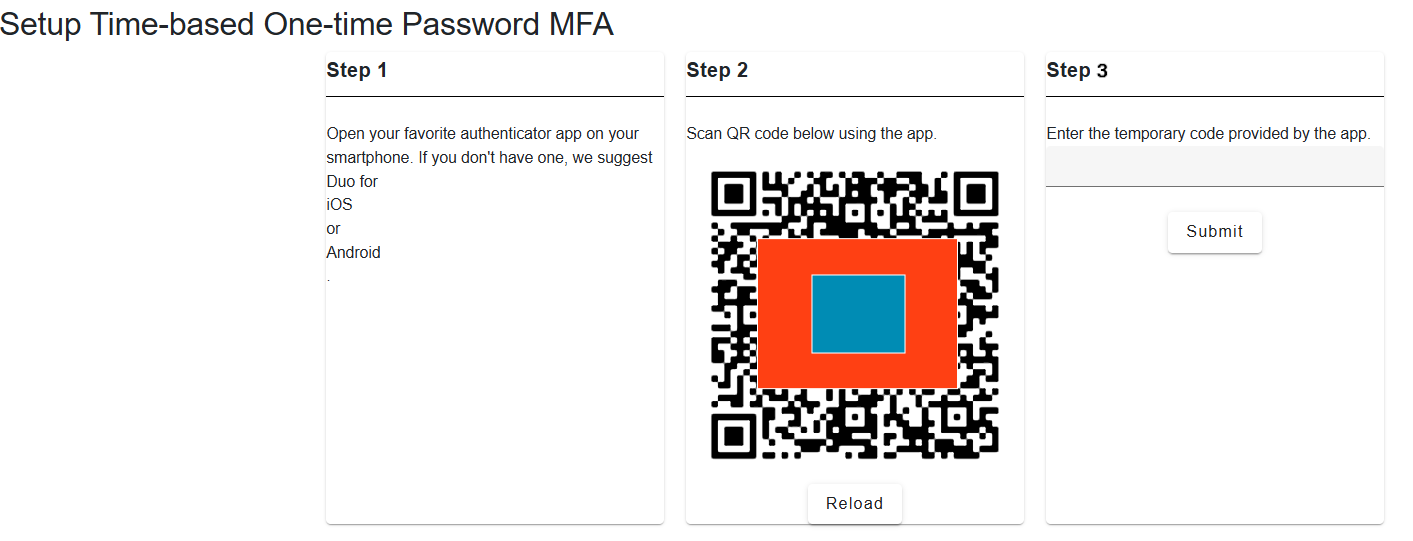
To enable TOTP MFA, first head into the “My Profile” section by clicking the gear on the bottom left.
Note: To enable MFA for your user, MFA must first be enabled by a tenant administrator in the account settings.

Then, head to “MFA” and click “Enable TOTP”.

Then, complete the steps in your TOTP Authenticator to enable MFA for Rizkly.
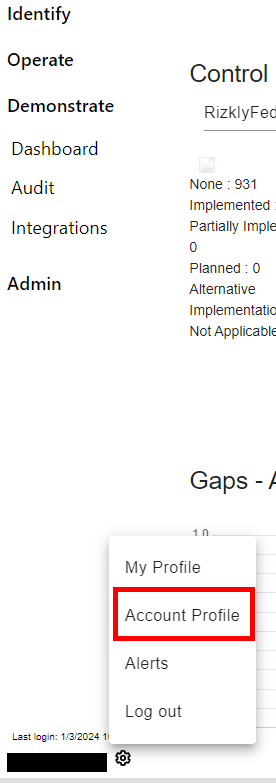
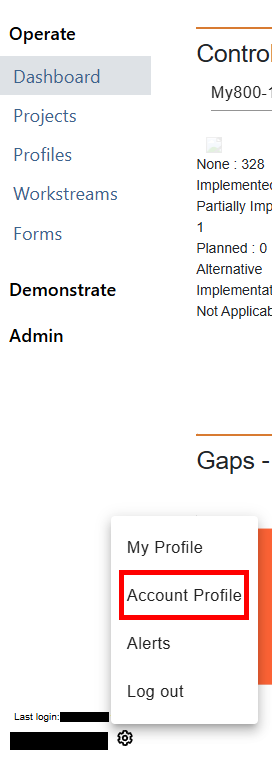
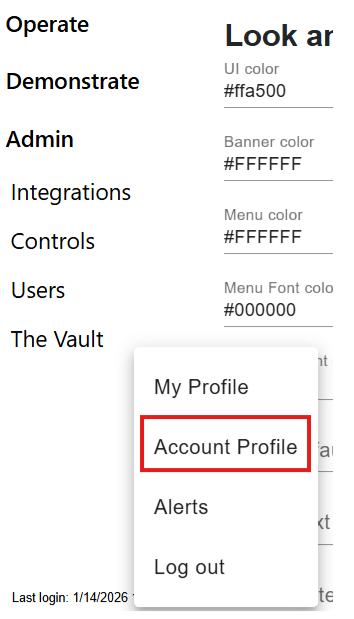
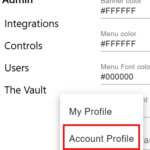
Select the Account Profile section on the gear icon the right hand side of the Taskbar.
This is where you may edit administrator information, such as email and company name. You may also add a logo by clicking on the “Upload new logo” buttons.

You can set a Legal Notice to appear for a user’s first login in the Account Profile Settings.

Once inside, head to the “Settings” tab and look for the “Legal Notice” field.

You may edit this as you wish to support internal corporate policies and/or regulatory notification requirements.
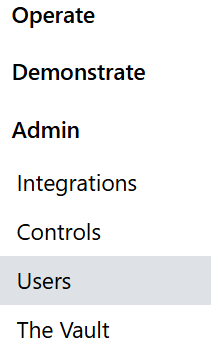
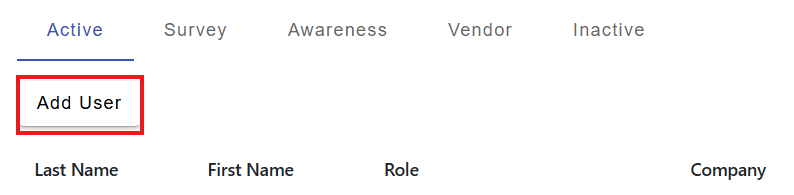
First, click on the “Users” tab on the Rizkly home screen.
Then, click the “Add User” button in the top left corner of the screen.
Fill out the necessary information. The necessary information is their First and Last Name, Email Address, and Role.
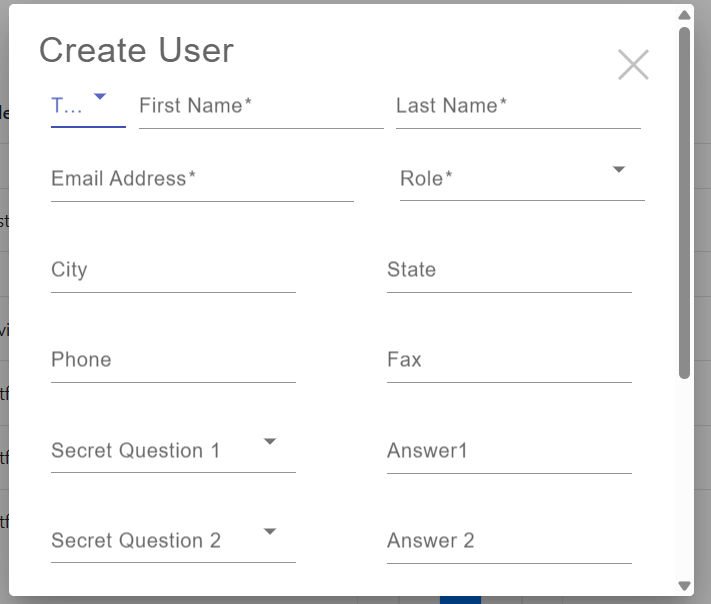
Then hit “save” once done. You will still need to invite users as a follow-up step.
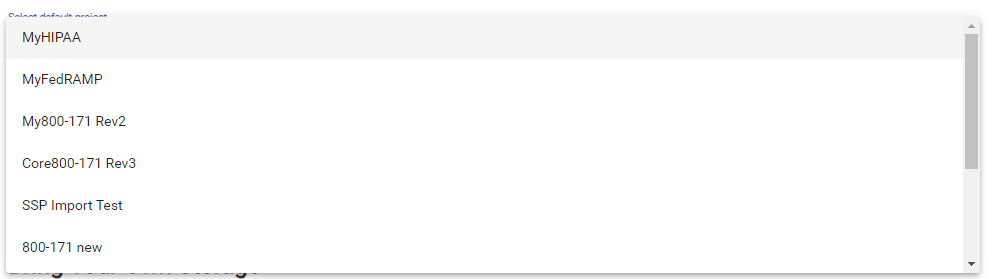
For all your widgets, there is one project that will appear first when you enter the dashboard. This can be changed by going to the “Account Profile” section of the settings, which can be accessed by clicking on the gear icon on the top right.
Once inside, head to the “Settings” tab and look for the Default Project drop down menu.
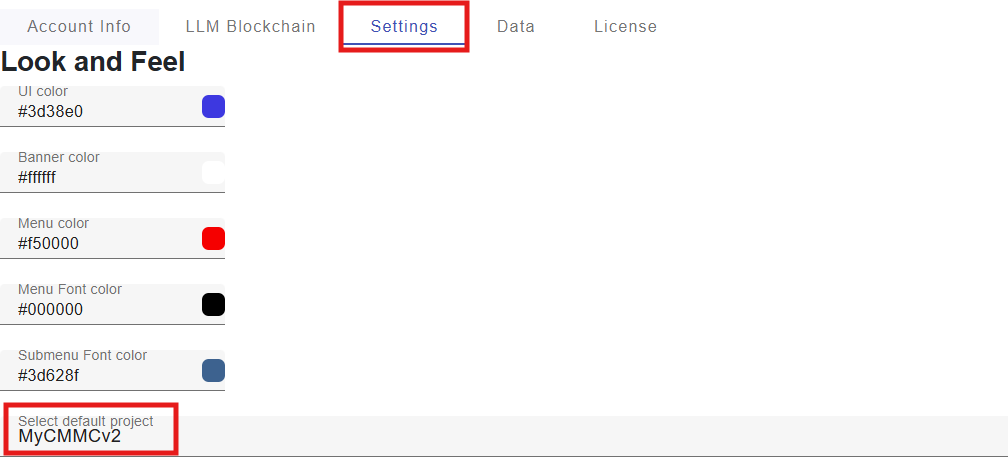
Select the project you desire and that one will be set for the dashboard.
In certain situations, customers can leverage their own storage via the “Bring Your Own Storage” option in the Account Profile Settings.
Once inside, head to the “Settings” tab and look for the “Bring Your Own Storage” dropdowns.
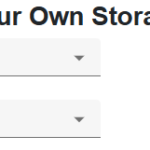
From here you may select the type of artifacts and data.